


Since MikroTik is an independent operating system based on the Linux kernel, connecting to its VPS might seem complicated at first. However, accessing MikroTik vps is actually quite simple and can be done in three different ways.
To get started with this powerful and efficient router, we recommend beginning by purchasing MikroTik VPS. Once you’ve acquired your desired virtual server, just follow the steps outlined in this article.
In this guide, we walk you through the process of connecting to your MikroTik server using Winbox and PuTTY, step by step. After completing the instructions, your MikroTik server will be ready to use.
Connecting to MikroTik via Winbox on Windows
The first method for connecting to MikroTik after purchasing your VPS is by using Winbox. To do this, download the Winbox application from the official MikroTik website.
After downloading the application, follow these steps:
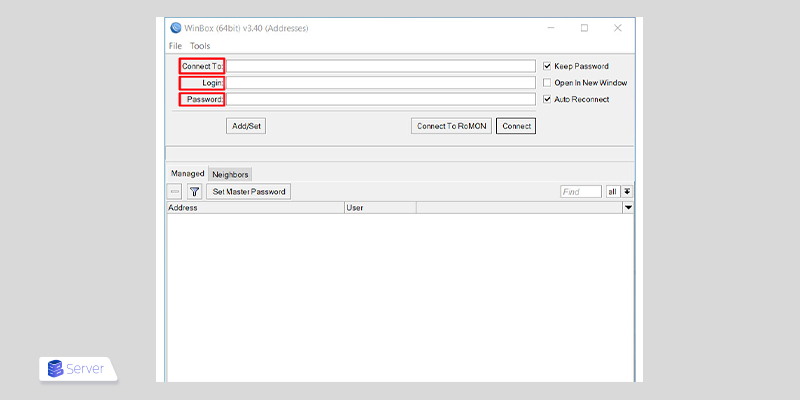
1. Click on the downloaded file and grant the necessary permissions to launch Winbox.
2. Once the program is running, the following window will appear. In this section, you need to enter your MikroTik VPS IP address, username, and password in the designated fields.
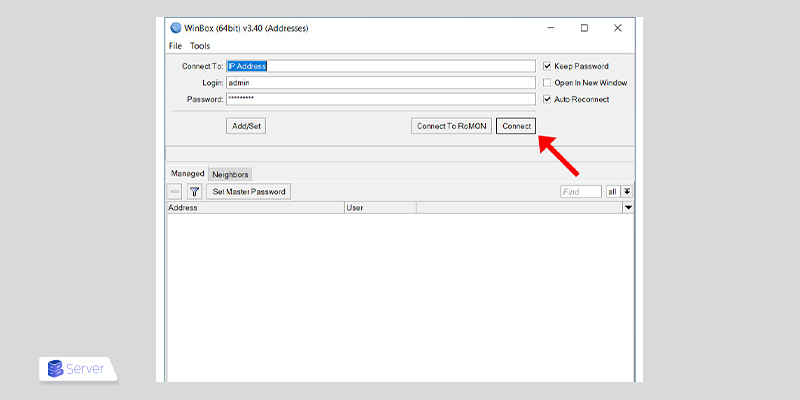
3. After entering your details, click on the Connect button.
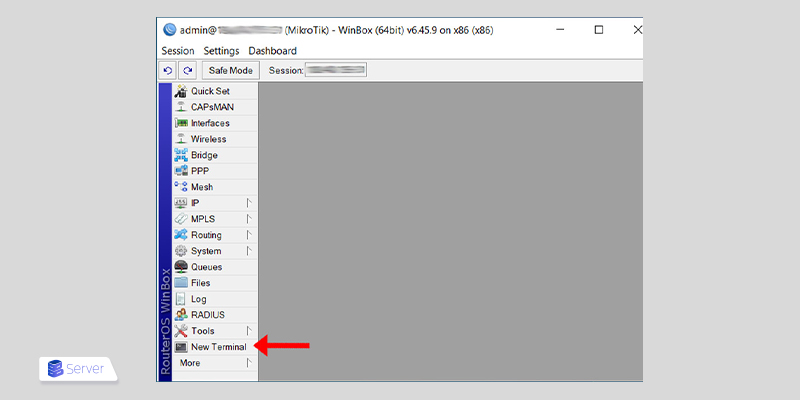
4. Once connected to MikroTik, you will see the following screen. Here, all the features and settings of your MikroTik VPS will be accessible. To open the terminal and enter your desired commands, select New Terminal from the menu on the left.
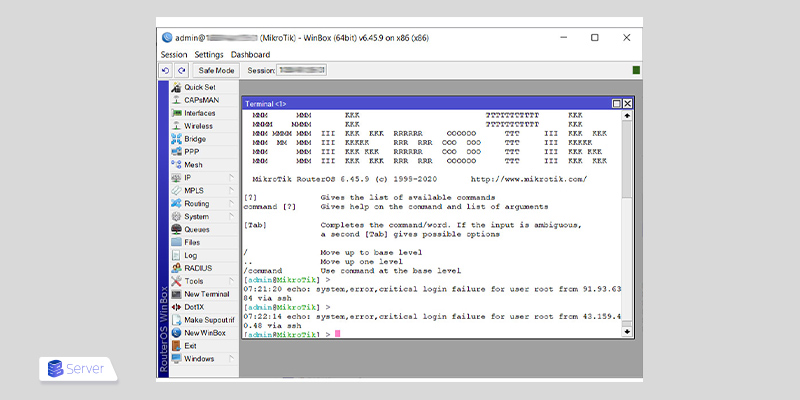
5. After selecting New Terminal, the following window will appear. In this window, you can type and execute the commands you need.
There are several reasons why Winbox might fail to connect to your MikroTik server. One common reason is attempting to connect using a Mac operating system. Since Winbox is not supported on macOS, you’ll need to use an alternative method.
Connecting to MikroTik VPS on macOS
If you’re using a Mac, the only way to access your MikroTik server is via a web browser. This method also works on Windows and Android devices. So, regardless of your operating system, you can connect to your MikroTik VPS by simply following the steps below:
1. First, open your web browser so you can enter the IP address of your MikroTik VPS into the address bar.
2. After entering the IP address provided by your VPS hosting provider when you purchased the MikroTik server, press Enter on your keyboard.
3. Next, you’ll see a login window. Here, enter your username and password in the appropriate fields.
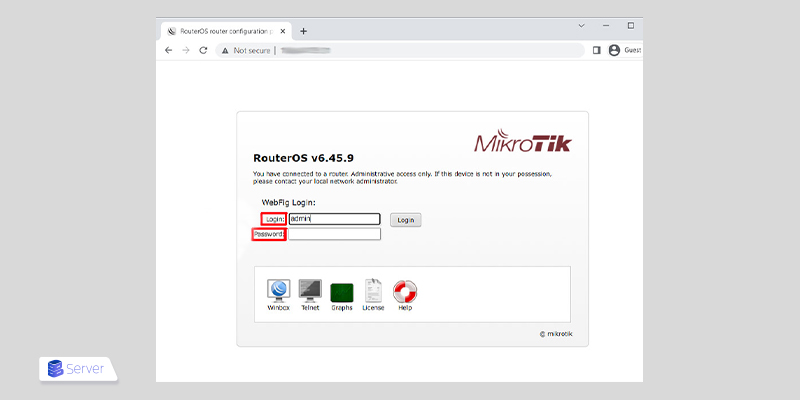
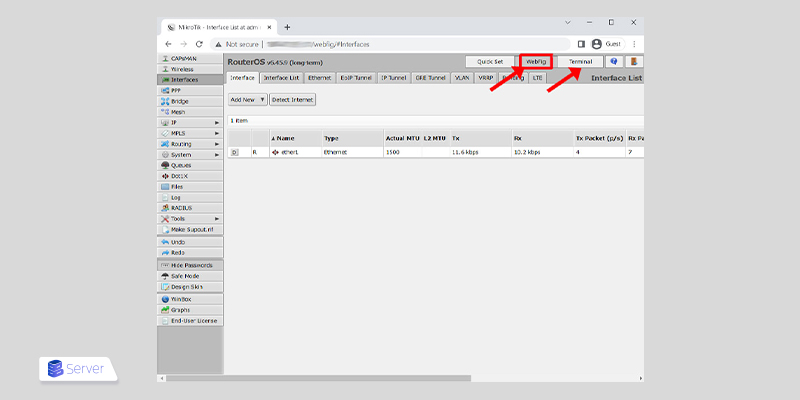
4. After entering your login details and clicking Login, the following page will appear. If you are redirected to a different page, simply select the WebFig option to continue. On this page, you will have full access to all the features and settings of your MikroTik server. If you want to access the server’s terminal, click on the Terminal option located next to WebFig.
Using PuTTY to Connect to MikroTik
You can also use PuTTY to connect to your MikroTik server from a computer. This program allows you to connect via either the SSH or Telnet protocol. Please note that in some MikroTik versions, SSH and Telnet access may be disabled by default.
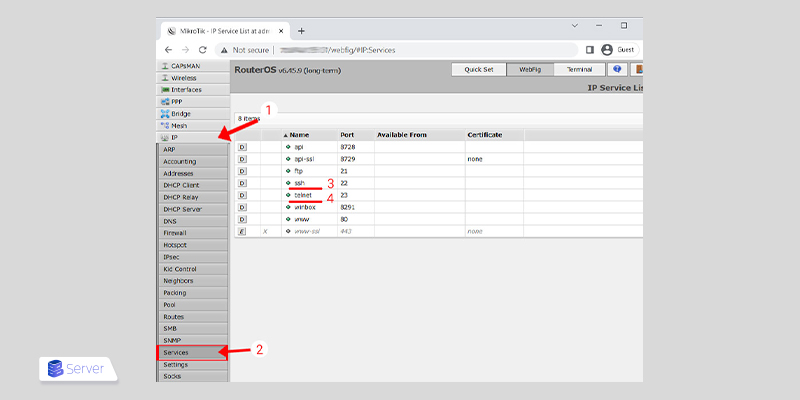
For this reason, we do not recommend using this method for your first connection. It’s better to first access your MikroTik server via the web interface. Once logged in, go to the menu on the left, select IP, and then click on Services. The following page will appear, where you can enable both SSH and Telnet for future use.
Next, to connect to using SSH or Telnet, you’ll first need to install the PuTTY application. Once installed, follow the steps below based on your preferred connection method.
Connecting to MikroTik VPS via SSH
After installing and launching PuTTY on your Windows system, follow these steps:
Note: If you’re trying to connect to your MikroTik server via mobile, you’ll need to use an SSH app designed for Android or iOS.
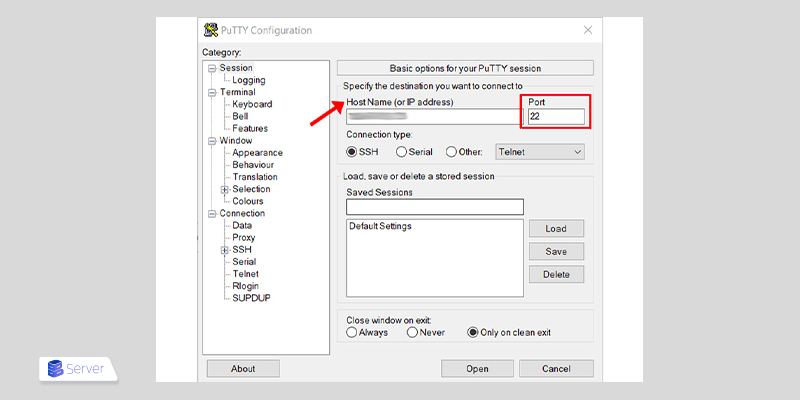
1. Open the PuTTY application. In the window that appears, enter the Host Name (IP address) of your server in the designated field. This IP is usually sent to your email by your VPS provider after purchase.
The SSH port for connecting to the MikroTik server is set to 22 by default.
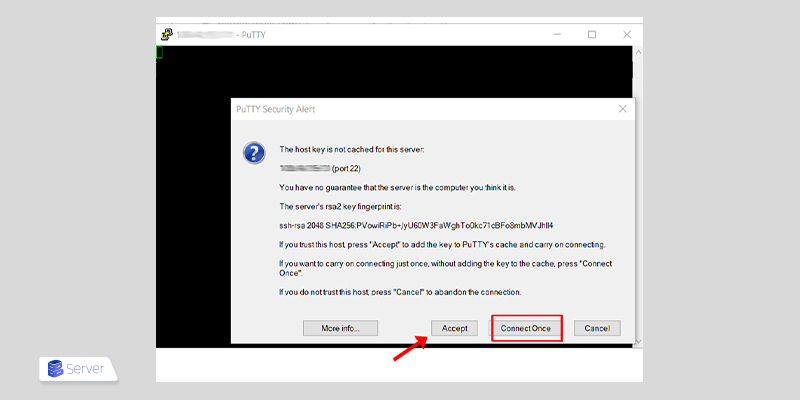
2. After clicking the Open button, a window will appear with a security message. This message informs you that the system is attempting to set an SSH key for the connection. If you select Accept, the key will be saved, and you’ll use it for future connections automatically. If you prefer not to save the key, click Connect Once to proceed with a one-time connection.
3. After completing the previous steps, the SSH connection to your MikroTik server should be established. In the Terminal window that appears, enter the username and password provided by your VPS hosting provider, which are typically sent to your email after the purchase.
4. Once connected to your MikroTik VPS via SSH, a welcome message will appear on the screen. At this point, your server is ready to receive and execute commands.

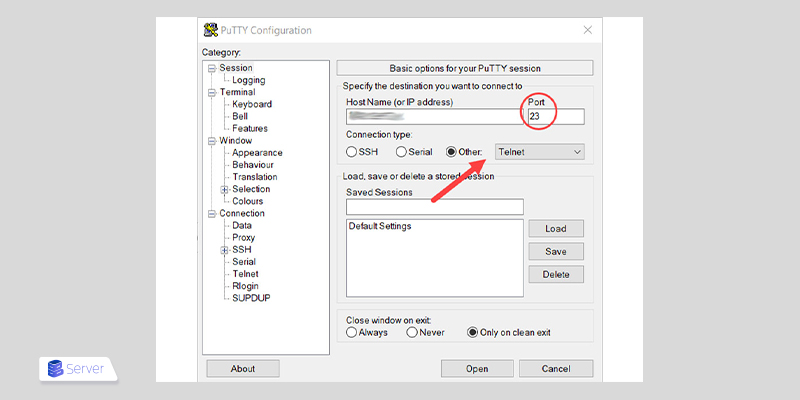
Connecting to MikroTik VPS via Telnet
Connecting to your MikroTik server via the Telnet protocol is very similar to the SSH method. The only difference lies in the initial configuration. To connect using Telnet, set the Port to 23, as shown below, and then click Open. Once the PuTTY Terminal window opens, follow the same steps as described earlier for SSH.
Conclusion
In this article, we explained how to connect to MikroTik for the first time, with step-by-step instructions for both macOS and Windows users. If you have any questions or run into issues while connecting to your MikroTik VPS, feel free to leave a comment below. The Buyserver support team will be happy to assist you.